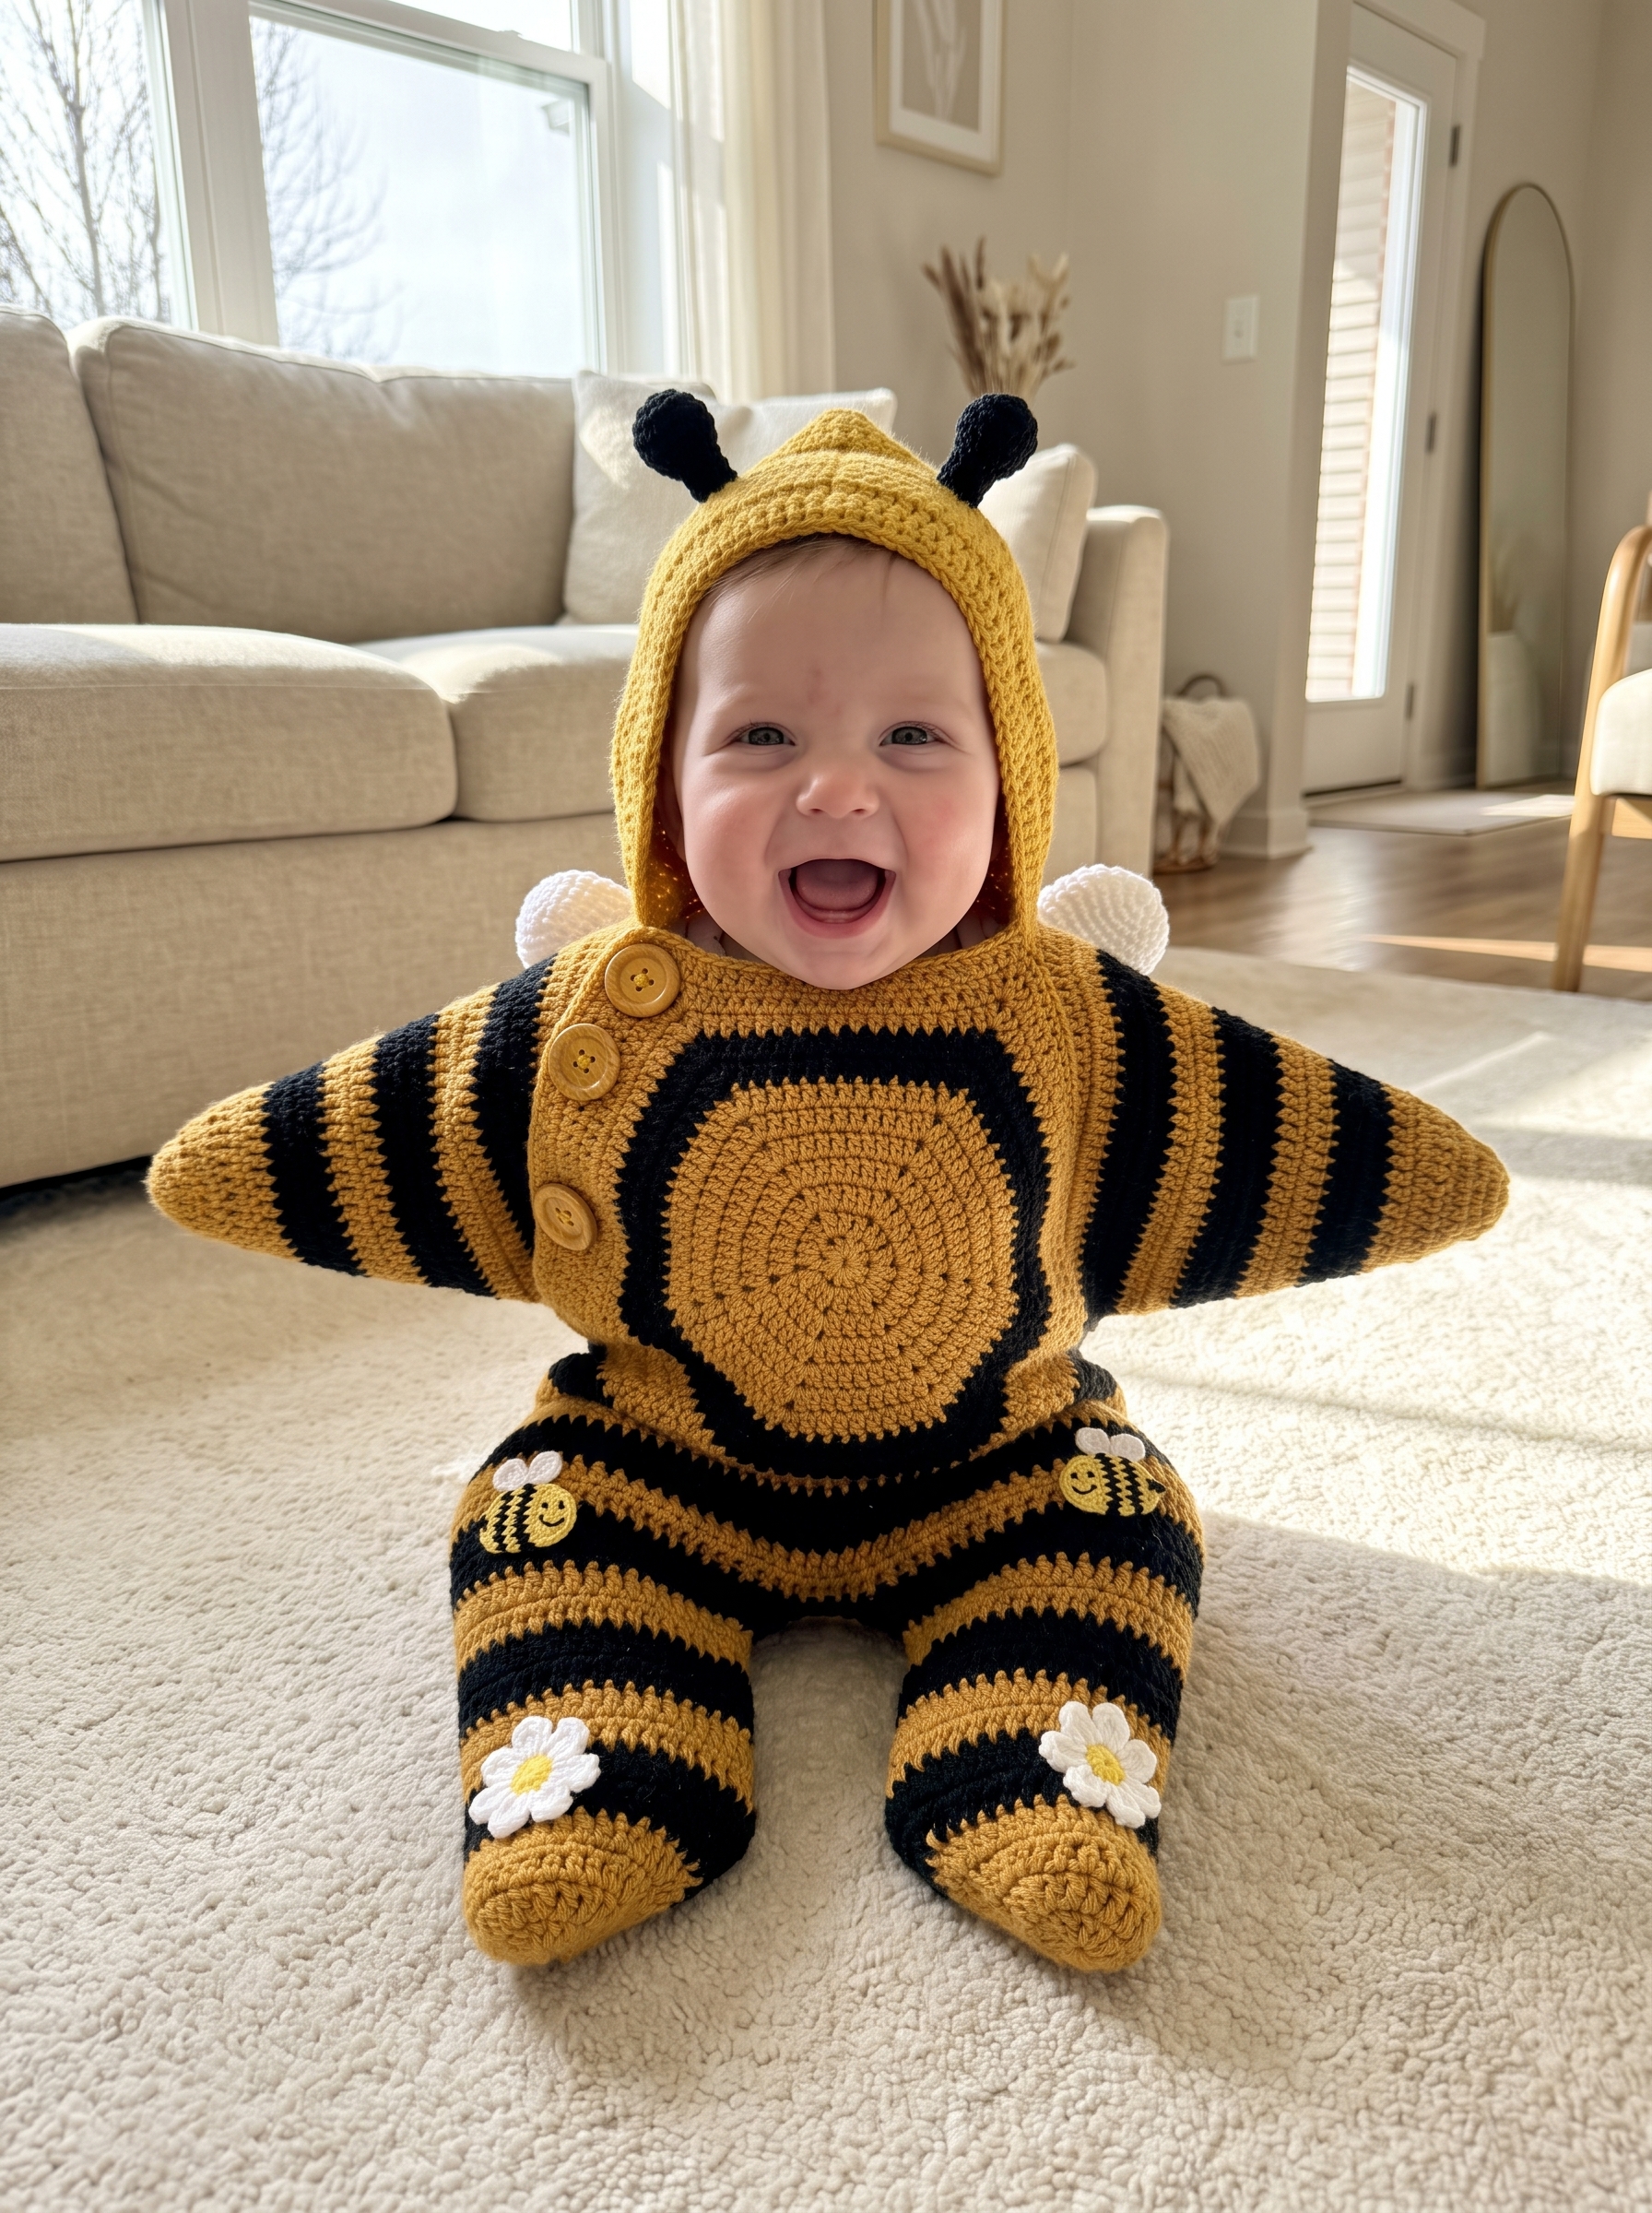

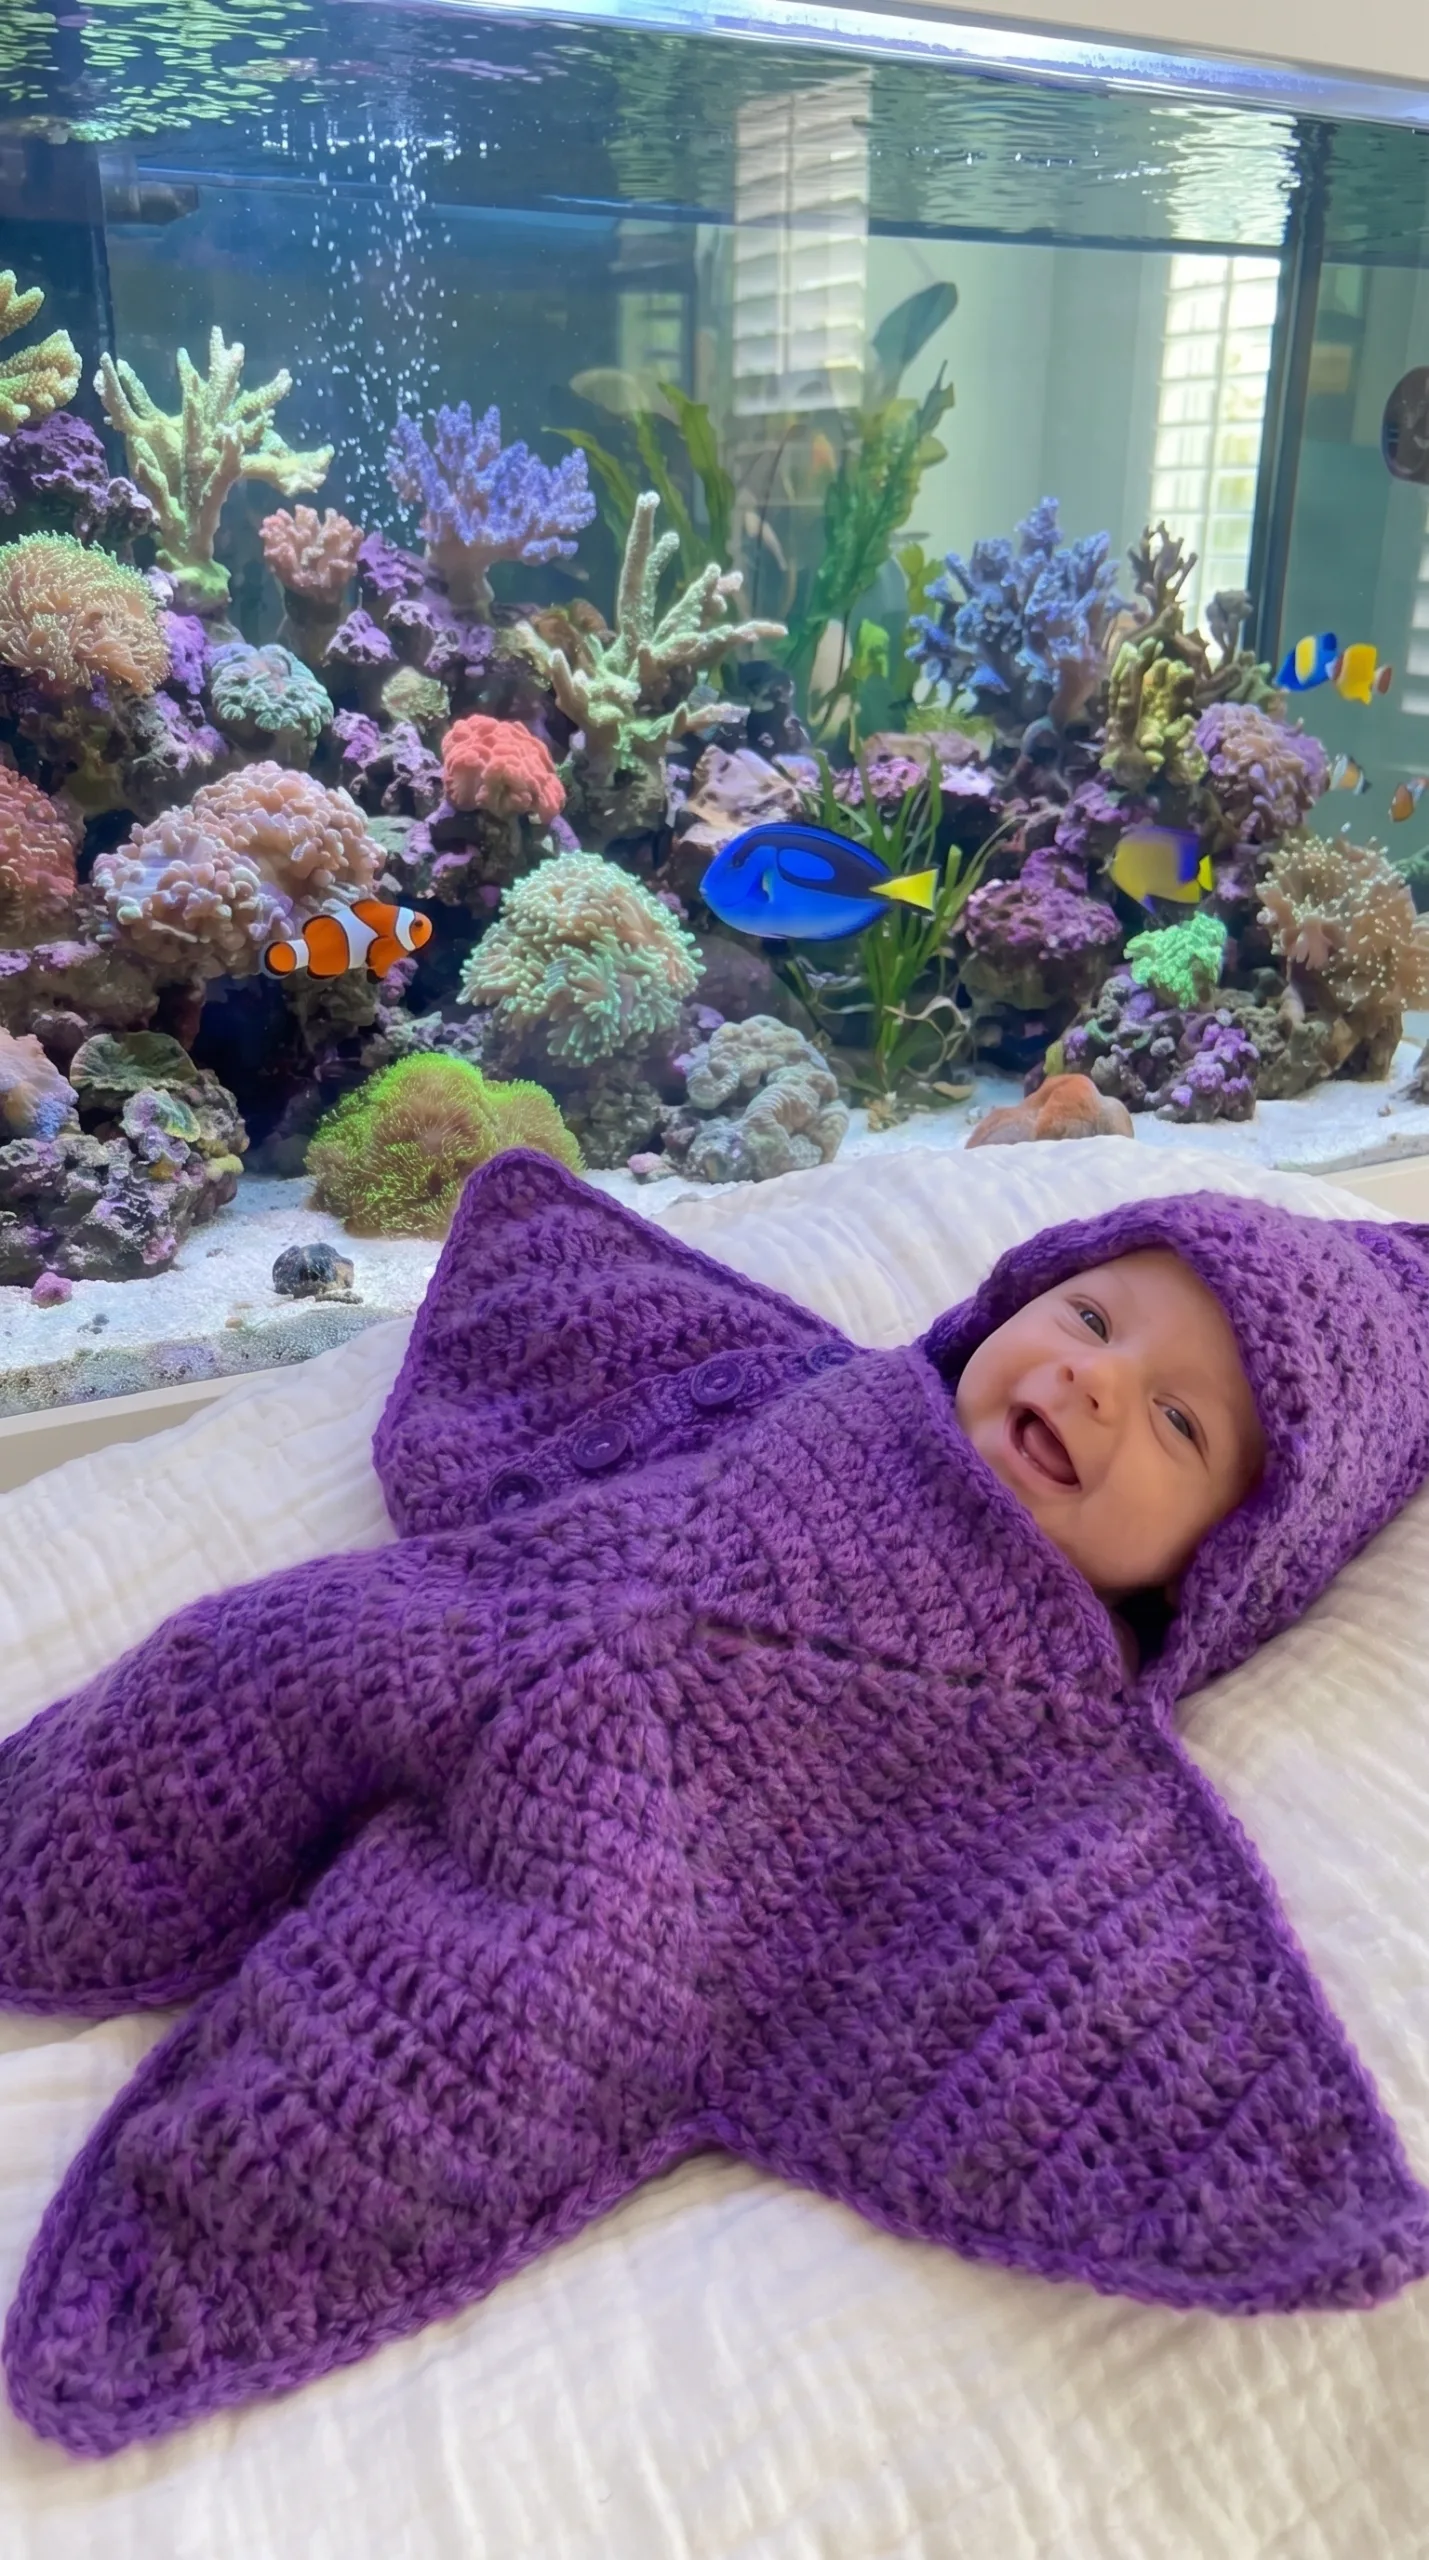
There’s something about a star-shaped baby cocoon that stops people mid-scroll — the five soft points, the little pointed hood, the way it photographs like nothing else in a newborn session. This pattern was designed and tested from scratch, worked in a soft violet worsted yarn, and built around a pentagon construction that’s genuinely satisfying to crochet: five points that all grow out of one center panel.
If you’re comfortable with basic double crochet and simple increases and decreases, this pattern is fully achievable in a weekend — and it makes an unforgettable baby shower gift or newborn photo prop. Below is the complete written pattern, in US terms, ready to make in whatever color makes your heart happy.
Size
Newborn / 0–3 months. The size is adjustable by adding rows to the point sections if you’d like a slightly larger finished piece.
Materials
- Purple worsted weight yarn (WW / Size 4) — or any color you love
- 5mm (H/8) crochet hook
- Yarn/tapestry needle
- Scissors
- 3 buttons (for closure)
Skill level: Intermediate (comfortable with dc, hdc, and basic increases/decreases)
Estimated time: 6–10 hours
Color Note
This pattern is shown in purple/lavender, but feel free to use any yarn color you love! Pastels, brights, neutrals — this design works beautifully in whatever shade suits your little one.
Abbreviations
This pattern is written in US terminology.
| Abbreviation | Definition |
|---|---|
| Ch | Chain |
| St(s) | Stitch(es) |
| Hdc | Half Double Crochet |
| Dc | Double Crochet |
| Dc Dec | Double Crochet Decrease |
| Rep | Repeat |
| Sk | Skip |
The Pattern
Pentagons (make 2)
- Row 1: Ch 3, 9 hdc in 3rd ch from hook. (10 dc)
- Row 2: Ch 4. 2 dc in next 2 dc, ch 1; rep to last dc, 2 dc in last dc, dc in beginning st. Join to 3rd ch of 4. (20 dc, 5 ch-1 sps)
- Row 3: Ch 4, 2 dc in next dc, dc in next 2 dc, 2 dc in next dc, ch 1; rep to end per pattern note.
Pattern Note: From this row forward, every round begins with ch 4 and works each of the five segments of the pentagon in turn. Each segment ends with another dc worked into the beginning stitch.
- Row 4: Ch 4, 2 dc in next dc, dc in next st, 2 dc in next 2 sts, dc in next st, 2 dc in next st, ch 1; rep to end.
- Row 5: Ch 4, 2 dc in next dc, dc in next 2 sts, 2 dc in next st, dc in next 2 sts, 2 dc in next st, dc in next 2 sts, 2 dc in next dc, ch 1; rep to end.
- Row 6: Ch 4, 2 dc in next st, dc in next 12 sts, 2 dc in next 2 sts, ch 1; rep to end.
- Row 7: Ch 4, 2 dc in next st, dc in next 14 sts, 2 dc in next 2 sts, ch 1; rep to end.
- Row 8: Ch 4, 2 dc in next st, dc in next 16 sts, 2 dc in next 2 sts, ch 1; rep to end. Fasten off, weave in all ends.
Mark your two pentagon shapes as “Front Upper” and “Back.”
Working the Back Pentagon
Lay the pentagon with a flat side at the top and place a stitch marker there to keep yourself oriented.
On each of the 4 non-marked sides, work as follows:
- Work 2 rows evenly across the edge.
- Work one decrease on each side until 4 sts remain: dc in 1st st, dc dec, dc in last st. Fasten off.
Repeat for the other 3 non-marked edges.
The Marked Edge (Hat Portion)
Attach yarn in end stitch.
- Row 1: [Dc in next 3 sts, 2 dc in next st] twice, dc in next 4 sts, [2 dc in next st, dc in next 3 sts] twice
- Row 2: Dc evenly across
- Rows 3–5: Dc in 1st st, dc dec in next, dc to last 3 sts, dc dec, dc in last st
- Row 6: Dc in 1st st, dc dec in next, dc in next 3 sts, dc dec, dc in next 4 sts, dc dec, dc in next 3 sts, dc dec, dc in last st
- Row 7: Dc in 1st st, dc dec, dc in next 3 sts, dc dec twice, dc in next 3 sts, dc dec, dc in last st
- Rows 8–11: Continue as established for the other points
Mark your top flat edge to keep yourself oriented. Work the two bottom edges and the edge immediately to the right (as viewed) of your marked edge the same way you worked the corresponding points on the back pentagon.
The Front Pentagon
Work 2 rows dc evenly. Fasten off and weave in ends. (22 dc per row)
The Open Edge
Ch 24.
- Row 1: Dc in 4th ch from hook and each ch across (22 dc)
Work remaining rows as established for the other points.
The Sleeve
Built the same way as the other points, using the same construction as the open edge.
Hat Section
Ch 30.
- Row 1: Dc in 4th ch from hook and each ch across (28 dc)
- Row 2: Dc evenly across (28 dc)
- Row 3: Dc in 1st dc, dc dec in next, dc to last 3 sts, dc dec, dc in last (26 dc)
- Rows 4–6: Work as Row 3, adding one extra dec in the middle each row
- Row 7: Work as Row 3, but make 2 dec in the middle
- Row 8: Work as Row 4
Continue as established for the other points. Fasten off and weave in ends.
Point-shaping note: For each point, work 3 hdc in the center dc sts to form a nicely defined point.
Assembly
- Align the hat piece to the hat point of the back pentagon and join the edges with sc.
- Align the loose sleeve/arm piece with the adjoining back portion and join with sc.
- Continue by adding the front portion, working around the remaining points and joining all with sc as established.
- When you return to the starting point, turn your piece so you can work a crab stitch (reverse single crochet) across the hat edge for a finished look.
- Add 3 buttons to the opening edge. No buttonholes are needed — the dc fabric has enough natural gaps for buttons to pass through.
Assembly Note: Start joining at the right side (as viewed) edge of the hat so you end back at that same point when you finish the round. Sc is used for the edging deliberately — it gives the seam a nice defined emphasis.
Tips for Making Your Star Cocoon
- Use stitch markers generously — with five points to track, it’s easy to lose your place without them.
- Keep your tension consistent throughout, especially through the pentagon rows, since any looseness there will show clearly once the piece is assembled.
- If you want a snugger fit for a smaller newborn, work one fewer row before starting the point shaping.
- Block your pentagon pieces flat before assembly — it makes the seaming so much easier.
- Save your button sewing for last, and try the piece closed before committing to placement, so you can adjust for a snug but easy fit.
- A wool-blend yarn adds a bit of natural stretch that makes this easier to wrap around a wiggly baby.
Notes & Variations
Button variation: Feel free to choose any button style, size, or color you love — wooden buttons, pastel buttons, or even themed shapes all work beautifully here.
Style it for every season: This exact pattern and construction works beautifully for any season or occasion — just change your yarn color and button choice. Try beige or neutral for a timeless, gender-neutral photo prop, orange with black buttons for a Halloween look, deep red with green buttons for a Christmas photo, or any shade that fits your celebration. The stitches, rows, and assembly stay exactly the same — only the color changes.
Baby safety note: This cocoon is designed as a photo prop and short-wear piece — never leave baby unattended while wearing it, and check that buttons are sewn on securely before each use, as buttons can be a choking hazard for young children.
About This Pattern
This pattern was designed and tested by me, Maria Lynn, with so much love, including techniques passed down from my grandmother, Mateo Espinoza Rangel, whose decades of crochet knowledge shaped so much of how I design today.
Loved this pattern? Find more like it in Our Crochet Corner.
Save this post to Pinterest so you can find it again, and check out our other free baby patterns below!