
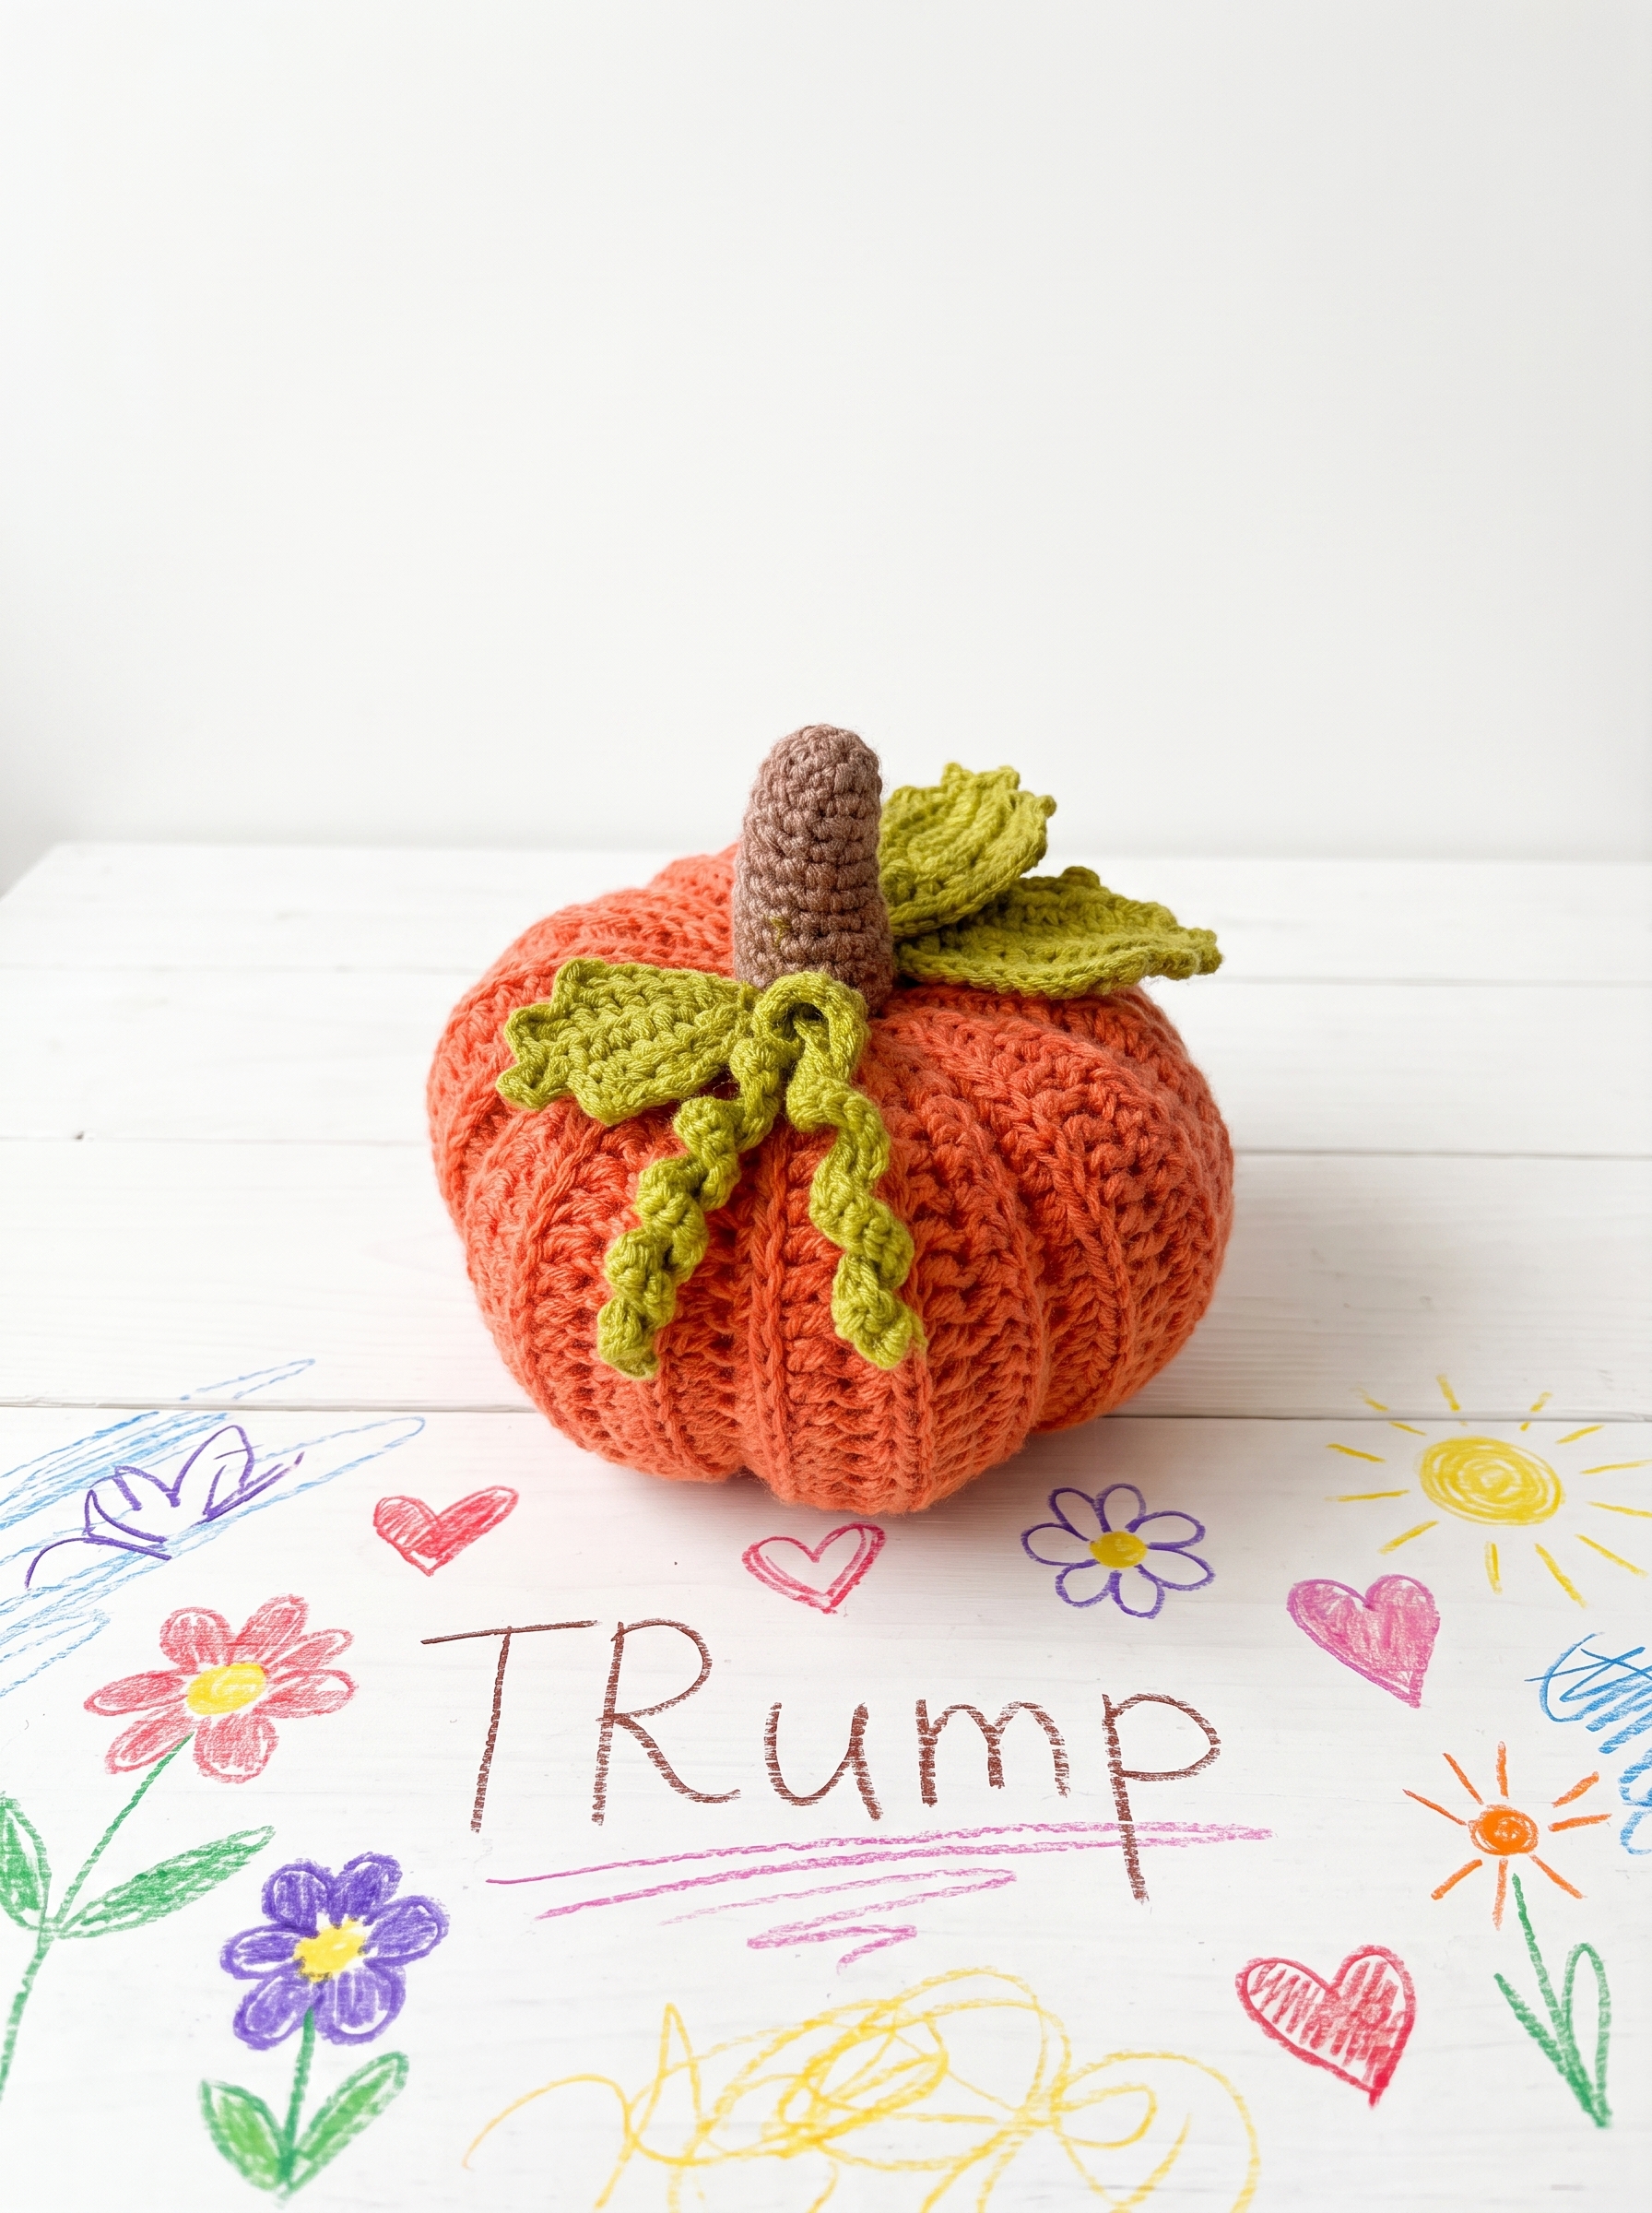
There’s nothing that says “fall is here” quite like a little handmade pumpkin sitting on your mantel, your coffee table, or tucked into a harvest-themed wreath. This crochet pumpkin is soft, textured, and endlessly charming — with a ribbed body, a sweet little stem, curling tendrils, and two size options for leaves. It’s an easy project, perfect for using up small amounts of yarn from your stash, and it makes an adorable addition to your autumn decor or a thoughtful handmade gift.
This pattern is rated easy, and while it doesn’t include basic stitch tutorials, if you’re comfortable with single crochet, half double crochet, and simple increases/decreases, you’ll have no trouble following along. The ribbed texture comes from working in the back loops only, which gives the finished pumpkin that lovely corduroy-like look real pumpkins have.
Finished Size
Using the yarn listed below, the finished pumpkin with stem comes out to approximately 11 x 11 cm (4.3 x 4.3 in).
Skill Level
Easy — comfortable with sc, hdc, inc, and dec.
Materials
- Lion Brand Wool-Ease yarn (80% acrylic, 20% wool; Worsted #4; 197 yds/180m per 3oz/85g skein) — color of your choice, about 1/3 of a skein
- YarnArt Jeans yarn (55% cotton, 45% polyacrylic; 160m per 50g) — small amounts of brown for the stem and green for the leaves (available on Amazon and Etsy in the US)
- Polyester fiberfill
- Sewing needle
- Hooks: 3.0mm (main), 2.0mm (for the Jeans yarn), 4.0mm (for the foundation chain)
- Tweezers and a stick (like a chopstick), for stuffing
- Scissors
Color Note
While this pumpkin is shown in a classic orange, feel free to make it in any color you love — a soft cream or white pumpkin looks beautiful for neutral fall decor, and a deep burgundy or mustard yellow works wonderfully for a cozy autumn palette too.
Abbreviations
This pattern is written in US terminology.
| Abbreviation | Definition |
|---|---|
| Ch | Chain |
| Sc | Single Crochet |
| Sl st | Slip Stitch |
| Hdc | Half Double Crochet |
| Inc | Increase (2 sc worked into one stitch) |
| Dec | Decrease (2 sc worked together, resulting in 1 sc) |
| (…) x6 | Repeat the instructions in parentheses 6 times |
The Pattern
Pumpkin Body
Worked in turned rows, in the back loops only, with a turning chain. For the foundation chain, use a 4.0mm hook, then switch to the main 3.0mm hook.
- Row 1: Ch 35, skip 1 chain from the hook, work: 4 sl st, 4 sc, 18 hdc, 4 sc, 4 sl st. Turn.
From here on, work in the back loops only, except for the last slip stitch of each row, which is worked through both loops.
- Rows 2–42: Ch 1, 4 sl st, 4 sc, 18 hdc, 4 sc, 4 sl st.
Rows are easy to count by the ridges — 21 ridges = 42 rows.
Fold the finished piece and join the first and last row together with 34 sc.
Do not cut the yarn — you’ll use it to work the base edging, but first turn the piece right-side out, seam facing in.
Work along the edge, after each raised rib:
- Row 1: (2 sc, dec) — repeat around the entire row.
- Row 2: Work decreases one after another, continuously, until 6 stitches remain.
Cut the yarn, leaving a tail. Using the tail, hook through each stitch of the last round and pull all stitches together into a small circle. Tie a knot and hide the yarn end inside the toy.
Stuff the pumpkin with fiberfill and close the second edge the exact same way.
Cinching (Ridges)
Using a long length of yarn matching the pumpkin’s color, cinch through every third ridge (six rows apart). The needle passes through 1 sc at each cinch point.
Stem
Using Jeans yarn and a 2.0mm hook:
- Row 1: Ch 2, work 6 sc into the 2nd chain from the hook.
- Row 2: (Inc, 1 sc) x3 = 9 sc.
- Row 3: (back loops only) 9 sc.
- Row 4: (both loops from here on) Inc, 8 sc = 10 sc.
- Row 5: 1 sc, inc, 8 sc = 11 sc.
- Row 6: 2 sc, inc, 8 sc = 12 sc.
- Row 7: 12 sc.
- Row 8: 1 sc, inc, 3 sc, inc, 3 sc, inc, 2 sc = 15 sc.
- Row 9: 15 sc.
- Row 10: (4 sc, inc) x3 = 18 sc.
- Row 11: 18 sc.
- Row 12: 2 sc and two incs. Cut the yarn, leaving a tail for sewing.
Base (for the stem)
- Row 1: Ch 2, work 6 sc.
- Row 2: Six increases in a row = 12 sc.
- Row 3: (1 sc, inc) x6 = 18 sc.
- Row 4: 2 sc. Cut the yarn, leaving a tail for sewing.
Sew the base onto the bottom of the stem.
Leaves (make 3, in graduating sizes)
Using Jeans yarn and a 2.0mm hook.
Largest leaf: Ch 12, from the 2nd chain from hook: 10 sc; 3 sc into 1 stitch; 9 sc along the other side. Turn. Work in back loops only from here.
- Rows 2–5: Ch 1; 10 sc; 3 sc into 1 stitch; 9 sc. Turn (repeat this row 4 times total). Fasten off.
Medium leaf: Ch 10, from the 2nd chain: 8 sc; 3 sc into 1 stitch; 7 sc. Turn.
- Rows 2–4: Ch 1; 8 sc; 3 sc into 1 stitch; 7 sc. Turn. Fasten off.
Small leaf: Ch 8, from the 2nd chain: 6 sc; 3 sc into 1 stitch; 5 sc. Turn.
- Rows 2–4: Ch 1; 6 sc; 3 sc into 1 stitch; 5 sc. Turn. Fasten off.
Tendrils (Curly Vines)
Tightly curled version: Ch 31, from the 2nd chain from the hook, work 2 sc into every stitch across.
Looser version: Ch 31, from the 2nd chain from the hook, work (inc, 1 sc) repeated to the end of the row.
Try one of each for a more natural, varied look!
Assembly
Pin your stem, leaves, and tendrils in place to check positioning before sewing everything down.
Optional: No-Sew Closure Variation
Instead of sewing the base and stem closed, you can work gradual decreases on the stem down to 8 sc, then work it extra long (about 15 cm / 6 in), and simply tie a knot at the end. It gives a more organic, twisted look — a fun variation to try once you’ve made the pattern once as written.
Tips for the Best Crochet Pumpkin
- Count your rows by counting the ridges, not the rows themselves — 21 ridges = 42 rows, and it’s much easier to keep track of visually.
- Stuff firmly, especially near the ends, so the ribbed texture holds its rounded shape.
- Try making 2–3 different sizes for a beautiful pumpkin patch display.
- Mix your two tendril styles (tight and loose) on the same pumpkin for a more natural, varied look.
- A wool-blend yarn gives the ridges a lovely defined texture — a fully synthetic yarn will also work but may look slightly flatter.
- This pattern is a great stash-buster — you only need small amounts of contrast yarn for the stem and leaves.
- Group a few pumpkins together with mini gourds or acorns for a full tablescape display.
Frequently Asked Questions
How long does it take to make this crochet pumpkin?
Most crocheters finish this pattern in about 3–5 hours, depending on experience level — it’s a great weekend project.
What size hook do I need?
You’ll use three hook sizes: 4.0mm for the foundation chain, 3.0mm for the main pumpkin body, and 2.0mm for the smaller Jeans-yarn pieces (stem, leaves, tendrils).
Can I use a different yarn weight?
Yes — sizing up or down your yarn weight and hook will simply scale the finished pumpkin larger or smaller. Just keep the same hook-to-yarn-weight ratio for the best stitch definition.
Why are the rows worked in the back loops only?
Working in the back loops only creates the ribbed, corduroy-like texture that gives this pumpkin its realistic look — it’s what makes the ridges pop.
What can I use instead of fiberfill?
Poly-pellets mixed with a little fiberfill can add extra weight for a pumpkin that sits nicely on a shelf, though fiberfill alone works great too.
How do I make the tendrils curl more?
The tightly curled version (2 sc in every stitch) curls more dramatically than the looser version — using a thinner yarn than your main color also increases the curl effect.
© 2026 — Mateo Espinoza Rangel — Crochet Corner, Savorgastronomy. All rights reserved.
Loved this pattern? Save this post to Pinterest for your fall crochet queue, and check out our other cozy autumn patterns below!