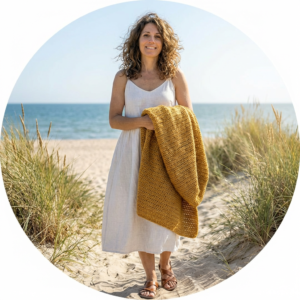

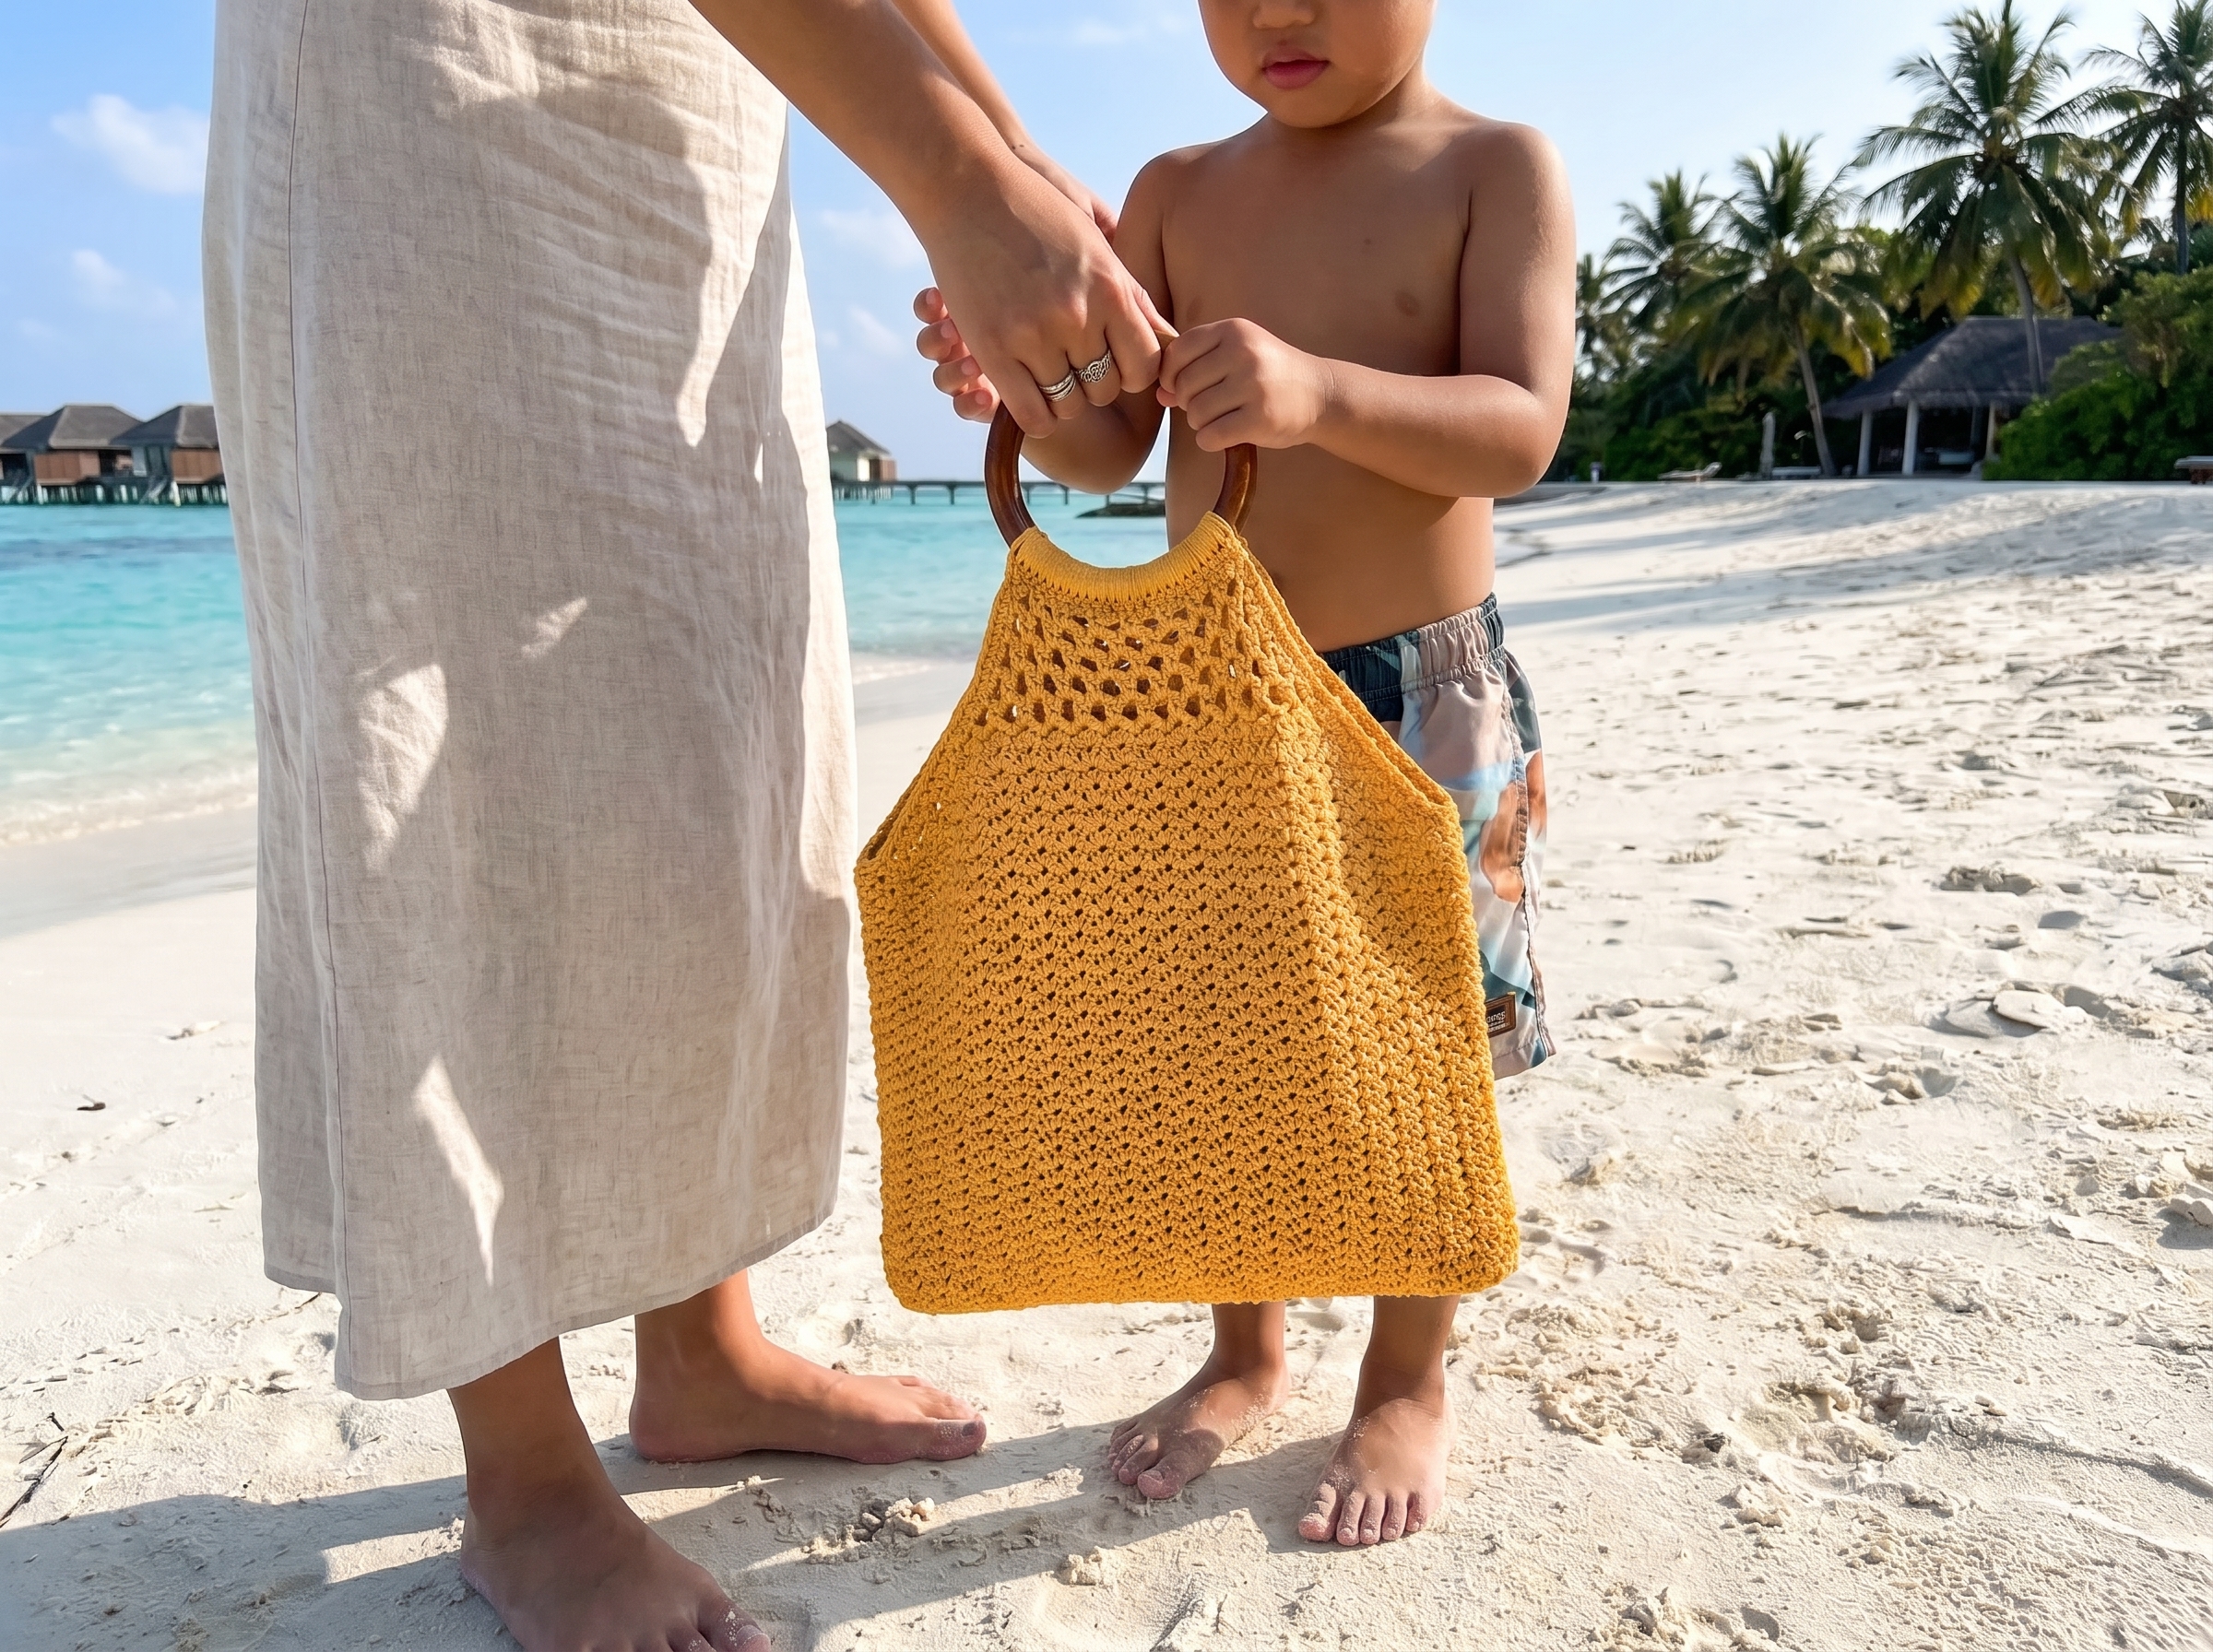
There’s something so satisfying about a market bag that’s as beautiful as it is useful. The Golden Sands Market Bag features a breezy mesh top, a sturdy shell-stitch body, and two wooden ring handles that make it just as at home on a beach day as it is on a farmer’s market run. It’s lightweight, reversible, and endlessly customizable — make it in a single color for a classic look, or play with stripes and color-blocking to make it your own.
📝 Note on Color: Feel free to make this bag in any color you love! The written pattern below references “Vanilla Cream,” but as you can see in the photos, this bag looks gorgeous in warm mustard/gold tones too — go with whatever speaks to you. This pattern is a blank canvas, so use your favorite color or whatever you have on hand in your stash.
Construction Overview
First, you’ll create a chain measuring the approximate width of your bag. You’ll stitch across your chain, then around the opposite side of the chain to set yourself up to work in joined, turned rounds. You’ll continue working the specified stitch pattern in the round until you reach your desired depth before splitting for the front and back sides. To attach the wooden ring, a row of stitches is worked directly onto the ring, then these stitches are sewn to the bag.
Materials
Yarn
DK held double (equivalent to 1 strand of worsted) — Paintbox Yarns Cotton DK (100% cotton), 137 yds (125 m) per 1.8-oz (50-g) skein
Skill Level: Easy
Yardage
5 skeins, or approximately 575 yds (526 m)
Yarn Substitution
Substitute with any similar light DK-weight (category #3) cotton yarn that matches gauge. DK-weight yarn held double is equivalent to one strand of worsted- or heavy worsted–weight yarn. Some testers also matched gauge with four strands of sport-weight (category #2) yarn.
Hook
Size F/5 (3.75 mm) or size needed to obtain gauge
Notions
Tapestry needle, 2 wooden rings measuring approximately 4.5 inches (11 cm) in diameter (measuring from the outer edges of the ring, with a 0.5-inch/1.3-cm-thick handle), at least 9 locking stitch markers, plus several more stitch markers to help with seaming the handle to the bag
Gauge
4 x 4″ (10 x 10 cm) = 6.5 V-sts and 14 rows
Pattern Notes
Stitch Counts: Stitch counts are listed after each row/round. If no stitch count is given, there has been no change since the previous row/round.
Reversible: There is no right side or wrong side to this fabric; both sides are identical. You will assign a “right side” later in the pattern when crocheting the handle.
Turning Chain: The turning chain does not count as a stitch anywhere in this pattern.
Yarn Held Double: This entire pattern is crocheted with two strands of yarn held together as if they were one.
Special Stitches
V-st (V-stitch): (sc, ch 2, sc) in designated st. (In UK terms: (dc, ch 2, dc) in designated st.)
Finished Measurements
- Width (Measurement A): approximately 11.5 inches (29 cm)
- Height from base to split of front pieces (Measurement B): 8.5 inches (22 cm)
- Height from base up to (but not including) wooden ring (Measurement C): 12.5 inches (32 cm)
Pattern
Base
With yarn held double, ch 50. Place BOR marker in 2nd ch from hook (the 49th ch).
Rnd 1: Sc in marked ch and in each ch across to last ch, work 3 sc in last ch and PM in middle of this sc group to mark the side of your bag, then sc down the opposite edge of the ch, working 1 sc into each ch across to marked ch, work 2 sc in marked ch, move BOR marker up to last sc just worked (this marker will help identify the first/last st of the rnd to make each join more clear), sl st into first sc to join work in the rnd, turn. [100 sc]
Sides
Rnd 1: Ch 1, V-st in first (marked) st and replace marker into first sc made, V-st in next st, *sk next 2 sts, V-st in next st; rep from * to next marked st, V-st in marked st and replace marker to the ch2-sp just created, V-st in next st; rep from * to end of rnd, sl st into marked sc to join rnd, turn. [36 V-sts]
In Rnd 2, you will work one increase at the start of your rnd. This is because you will need an odd number of V-sts later when you work the top of your bag.
Rnd 2: Ch 1, (sc, ch 2, sc, ch 2, sc) in first ch2-sp and replace marker into first sc made, V-st in each ch2-sp around to next marked ch2-sp, V-st in marked ch2-sp and replace marker to the ch2-sp just created, V-st in each ch2-sp to end of rnd, sl st into marked sc to join rnd, turn. [37 ch2-sps]
Rnd 3: Ch 1, V-st in first ch2-sp and replace marker into first sc made, V-st in each ch2-sp around to next marked ch2-sp, V-st in marked ch2-sp and replace marker to the ch2-sp just created, V-st in each ch2-sp to end of rnd, sl st into marked sc to join rnd, turn. [37 V-sts]
Repeat Rnd 3 until you have worked a total of 28 rnds, or until your bag measures approximately 8.5 inches (22 cm) from the bottom edge when lying flat. To adjust the depth of your bag, repeat Rnd 3 as many times as desired.
Top — First Side
In this section, you’ll work flat in back-and-forth rows while decreasing at the edges to give the top of your bag a tapered shape. Your work should currently have one marker in the 19th ch2-sp, which divides your rnd perfectly in half with 18 V-sts on either side of the marked V-st.
Up until this point, the fabric of your bag has been reversible. In the next row, you will assign a RS and WS to your bag.
Row 1 (RS): Ch 1, V-st in each ch2-sp up to (but not including) the next marked space, PM anywhere on the outside of your fabric to mark the RS, turn. [18 V-sts]
Row 2 (WS): Ch 1, sc in first ch2-sp, V-st in next ch2-sp and in each ch2-sp across to last ch2-sp, sc in last ch2-sp, turn. [16 V-sts, 1 sc on each end]
Row 3: Ch 1, sk first sc, V-st in each ch2-sp across, sl st into last sc, turn. [16 V-sts]
Row 4: Ch 1, sl st into first sc and first ch2-sp, ch 1, sc in first ch2-sp (this sc counts as the first st of the row), V-st in next ch2-sp and in each ch2-sp across to last ch2-sp, sc in last ch2-sp, turn. [14 V-sts, 1 sc at each end]
Row 5: Repeat Row 3. [14 V-sts]
Row 6: Repeat Row 4. [12 V-sts, 1 sc at each end]
Row 7: Repeat Row 3. [12 V-sts]
Mesh Section
Row 8 (WS): Ch 1, sl st into first sc, sc in ch2-sp, *ch 3, sc in next ch2-sp; rep from * to end of row, turn. [11 ch3-sps]
Row 9 (RS): Ch 2, sc in first ch3-sp, *ch 3, sc in next ch3-sp; rep from * to end of row, turn. [10 ch3-sps]
Row 10: Repeat Row 9. [9 ch3-sps]
Row 11: Repeat Row 9. [8 ch3-sps]
Row 12: Ch 2, sc in first ch3-sp, *ch 2, sc in next ch3-sp; rep from * to end of row. [7 ch2-sps]
Fasten off and weave in ends.
Top — Second Side
With the completed side down and the RS of the unfinished side facing you, join new yarn (double stranded) with a sl st to the next available ch2-sp beside the marked ch2-sp. This marked ch2-sp will be left unworked.
Row 1 (RS): Ch 1, V-st in same ch2-sp as sl st join, V-st in each ch2-sp across to end of row (ending at BOR marker), turn. [18 V-sts]
Repeat all instructions from the Top — First Side section, starting at Row 2 and onward, to create an identical side. Keep any markers in place.
Border
Next, you’ll crochet one round of sc along the entire top edge of your bag to clean up any raw edges.
With the RS facing you, join new yarn (double stranded) to the BOR.
In the following round, there are suggested stitch counts provided; however, simply place your stitches wherever they seem to fit nicely. You may work a few more or a few less than these suggested numbers and that is okay. The exact stitch count in this border round does not matter — what matters is that the edge of your bag looks neat and that you’re satisfied with the appearance.
Border Rnd: Ch 1, *work approximately 12 sc (or however many needed) along the diagonal edge of your bag until reaching the mesh section, then work 12 sc (or however many needed) along the diagonal edge of the mesh section until reaching the top corner, work 22 sc across top edge, placing a marker into the first and last st to mark out your handle, then work approximately 12 sc along the diagonal edge of the mesh section until reaching the V-st rows, then work approximately 12 sc along the diagonal edge of the V-st section until reaching the marked st; rep from * once more, sl st into first st to join rnd.
You should have placed four markers in this border round, outlining two sections of 22 sts.
You may choose to block your bag at this point before attaching the handles. You can still block your bag afterward, but it will be a bit easier at this point without the added bulk, and this way your wooden rings can avoid excess moisture.
Handle
Preparing Your Wooden Ring
Join new yarn (held double) to the ring with a sl st and work 22 sc around the ring. Place a marker into the side that’s facing you as you work your sc sts to mark the WS of the handle. Fasten off, leaving one of your two strands at least 18 inches (46 cm) long for seaming these sts to your bag. Cut your other strand, leaving a tail long enough to weave in.
Seaming the Wooden Ring to the Bag
Lay your bag flat with the WS facing you on both the bag and the ring. There are 22 sts along the top edge of your bag at the handle area and 22 sc sts on your handle. Make sure these sts are properly aligned, using locking stitch markers to help hold your work in place for even seaming.
Using a tapestry needle and the long, single-stranded tail you left from your handle, seam the sc sts on the wooden ring to the bag using the whip stitch (see [Essential Crochet Techniques for Garment-Making] for a full whip stitch tutorial), stitching through both loops of each sc st on the ring as well as the sts along the top edge of the bag.
Repeat all instructions for the second handle.
Finishing
Remove all markers and weave in any remaining ends. Enjoy your new market bag! 🌻