Amigurumi blue tang—I’m thrilled to share the next star in my crochet fish aquarium collection! After crafting the vibrant clownfish, I couldn’t wait to add a blue tang, inspired by its dazzling blue hue from ocean documentaries I loved as a kid. My grandma sparked the idea for this aquarium project, and this pattern brings that underwater magic to life. Whether you’re building your own aquarium or just love sea creatures, this no-sew blue tang is an exciting project to dive into!
Pattern Details: A Vibrant No-Sew Amigurumi
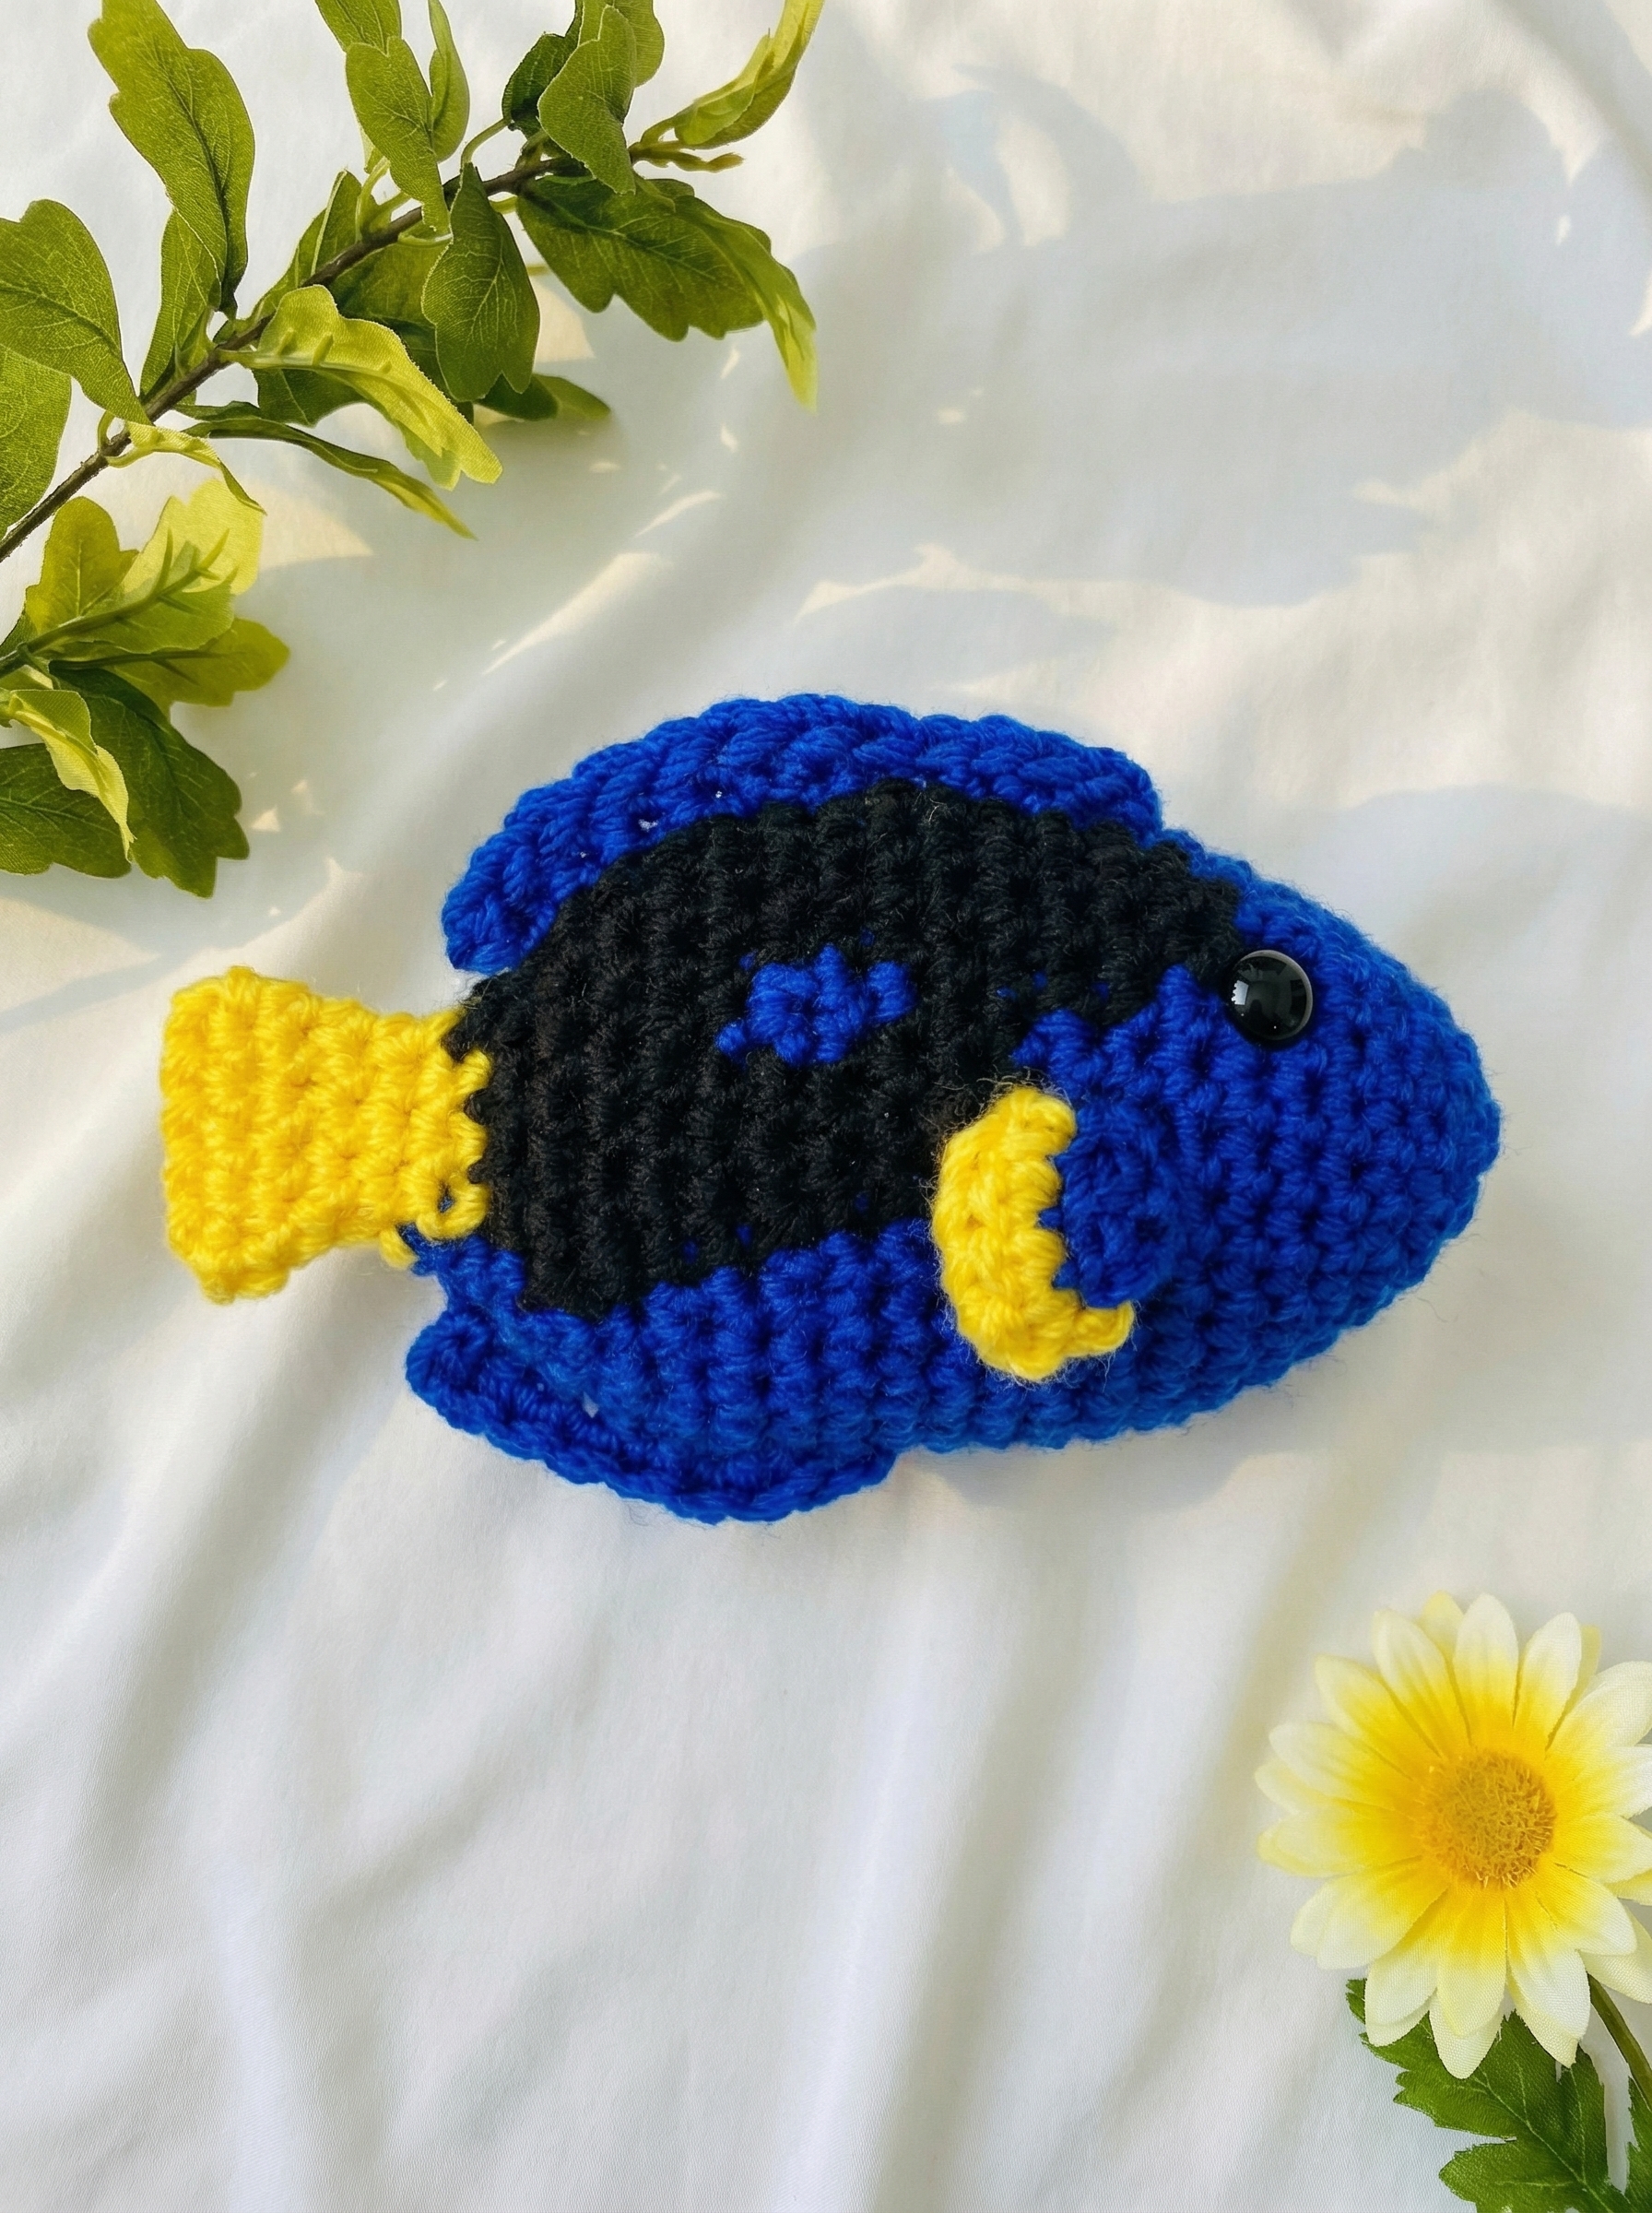
This intermediate-level pattern creates a stunning amigurumi blue tang fish, perfect for your crochet aquarium or as a playful gift. Using Super Bulky yarn and a 3.5mm hook, it’s worked in rounds with no sewing required, making it a quick and fun project for crocheters ready to tackle color changes and shaping.
Materials Needed: Gather Your Supplies
Here’s what you’ll need to craft this amigurumi blue tang with the bold colors I chose for my aquarium:
- Yarn: Super Bulky / Category 6 in blue (main body), black (accents), and yellow (tail)
- Hook: 3.5mm (E)
- Tools:
- Stitch marker
- Sewing needle
- Scissors
- Plastic safety eyes (8mm)
- Hot glue gun
- Fiberfill for stuffing
Note: You can choose any colors you want to personalize your blue tang!
Abbreviations: US Crochet Terms
I use standard US terminology to keep this pattern clear and easy to follow:
- MR: Magic Ring
- st(s): stitch(es)
- sl st: slip stitch
- ch: Chain
- SC: Single crochet
- DC: Double crochet
- DEC: Decrease
- INC: Increase
- HDC: Half double crochet
Crochet Pattern Instructions:
Follow these steps to crochet your amigurumi blue tang fish, designed to swim beautifully in your aquarium. Work in spirals and use a stitch marker to track rounds. Bold text indicates a switch to black yarn.
Body (from Head to Tail)
This no-sew body is worked continuously from head to tail, creating the blue tang’s smooth, rounded shape.
Begin with blue yarn.
Row 1: 5 SC in an MR (5)
Row 2: 2 SC, INC, 2 SC (6)
Row 3: INC, SC, 2 INC, SC, INC (10)
Row 4: SC, 7 INC, 2 SC (17)
Row 5: 4 SC, (INC, SC) 4 times, INC, 4 SC (22)
Row 6: 5 SC, (INC, SC) 6 times, 5 SC (28)
Row 7: 8 SC, INC, 10 SC, INC, 8 SC (30)
Row 8: 14 SC, 2 SC, 14 SC (30)
Row 9–10: 13 SC, 4 SC, 13 SC (30)
Row 11: 10 SC, 10 SC, 10 SC (30)
Row 12: 9 SC, 2 SC, 2 SC, 4 SC, 2 SC, 2 SC, 9 SC (30)
Row 13: 9 SC, SC, 3 SC, 4 SC, 3 SC, SC, 9 SC (30)
Row 14: 3 SC, DEC, 3 SC, DEC, 3 SC, DEC, 2 SC, SC, DEC, 2 SC, DEC, 3 SC, DEC (24)
Row 15–16: 6 SC, 2 SC, 3 SC, 3 SC, 2 SC, 2 SC, 6 SC (24)
Row 17: 2 SC, DEC, 2 SC, (DEC, 2 SC) 3 times, DEC, 2 SC, DEC (18)
Row 18: 5 SC, 9 SC, 4 SC (18)
Row 19: (SC, DEC) 2 times, (SC, DEC) 3 times, SC, DEC
Stuff firmly with fiberfill.
Cut the black and blue yarn.
Tail
Change to yellow yarn.
- Row 20: Crochet 2 sides together with 6 SC
- Row 21: Turn, 2 CH, DC-INC 6 times (12)
Change to black yarn.
- Row 22: Turn, CH, 12 SC (12)
Weave in the yarn end and cut.
Dorsal Fins: Part 1 (Make 2)
These small fins add detail and dimension to the blue tang’s body.
Begin with blue yarn.
- Pick up yarn from Row 7, leaving 8 stitches between each fin for even placement.
- Row 1: (CH 1, HDC, 3 DC, HDC) worked into one stitch (5 sts in the same stitch)
- Change to yellow yarn
- Row 2: Turn, CH 1, 5 SC (5)
Fasten off and weave in ends.
Tip for readers:
Working multiple stitches into one stitch creates the fan-shaped fin edge
Dorsal Fins: Part 2
This larger dorsal fin runs along the center of the fish and gives the blue tang its recognizable silhouette.
Begin with blue yarn.
- Pick up yarn along the vertical center line of the body, starting at Row 8 and ending at Row 16.
- Row 1: (CH 1, SC, 7 DC, SC) worked into one stitch (9 sts in the same stitch)
- Change to black yarn
- Row 2: Turn, CH 1, 9 SC (9)
Fasten off and weave in ends.
Eyes
These eyes give your amigurumi blue tang its expressive character.
- Attach 8mm plastic safety eyes between Rows 5–6, leaving 8 stitches between them.
- Once positioned correctly, secure the backs firmly.
- A small amount of hot glue may be used to help prevent movement during play or display.
Safety note:
This amigurumi is intended for decorative or supervised use.
If making this item for young children, consider embroidering the eyes instead of using plastic safety eyes.
Assembly:
This amigurumi blue tang is designed as a no-sew body, with all shaping worked directly from head to tail. Only the dorsal fins and eyes require placement.
- The body is crocheted continuously from the head to the tail, so no sewing is required for the main structure.
Refer to the body progress photos to confirm the overall shape before adding details. - Attach the two small dorsal fins (Part 1) to Row 7, spacing them evenly on each side of the body.
Use the close-up fin placement images to match the angle and spacing shown. - Attach the large center dorsal fin (Part 2) along the vertical center line of the body, starting at Row 8 and ending at Row 16.
Align the fin carefully using the side-view and top-view reference photos to ensure it runs straight from head toward the tail. - Once all fins are positioned correctly, secure and weave in all yarn ends neatly on the inside of the body.
Before finishing, compare your piece with the final photos to check symmetry, fin alignment, and overall proportions.
Congratulations! Your blue tang is ready to swim in your crochet aquarium!
Tips & Tricks: Make Crocheting Easier
These tips helped me create a flawless blue tang, and I’m excited to share them with you:
- Use a stitch marker to track rounds, especially since this pattern is worked in spirals.
- Stuff the fish firmly but carefully to keep its shape without stretching the stitches.
- Carry the yarn inside the stitches when changing colors for a clean, professional look.
- Test your gauge to ensure the fish matches the intended size—Super Bulky yarn can vary, so adjust your hook if needed.
Conclusion:
I’m so happy to share this amigurumi blue tang pattern with you—it’s a vibrant addition to my crochet fish aquarium, and I know it’ll bring joy to yours too! Seeing your finished blue tang would make my day, I can’t wait to see your creation! Stay tuned for the next piece in this collection, a charming starfish, to complete your underwater world!
Frequently Asked Questions
What yarn weight is best for an amigurumi blue tang?
I recommend Super Bulky (Category 6) yarn for a plush, sturdy finish. It gives the fish a bold texture perfect for an aquarium display.
Can I make this fish larger or smaller?
Yes, adjust the size by using different yarn weights and hook sizes. For a smaller fish, try DK yarn with a 2.5mm hook; for a larger one, use chunky yarn with a 5mm hook.
Is this pattern suitable for beginners?
This is an intermediate pattern due to color changes and shaping, but beginners with some experience can tackle it with patience. It’s a great way to grow your skills!
How do I manage color changes in a no-sew pattern?
Carry the yarn inside the stitches when switching colors (e.g., from blue to black). I found this technique keeps the transitions smooth and tidy.