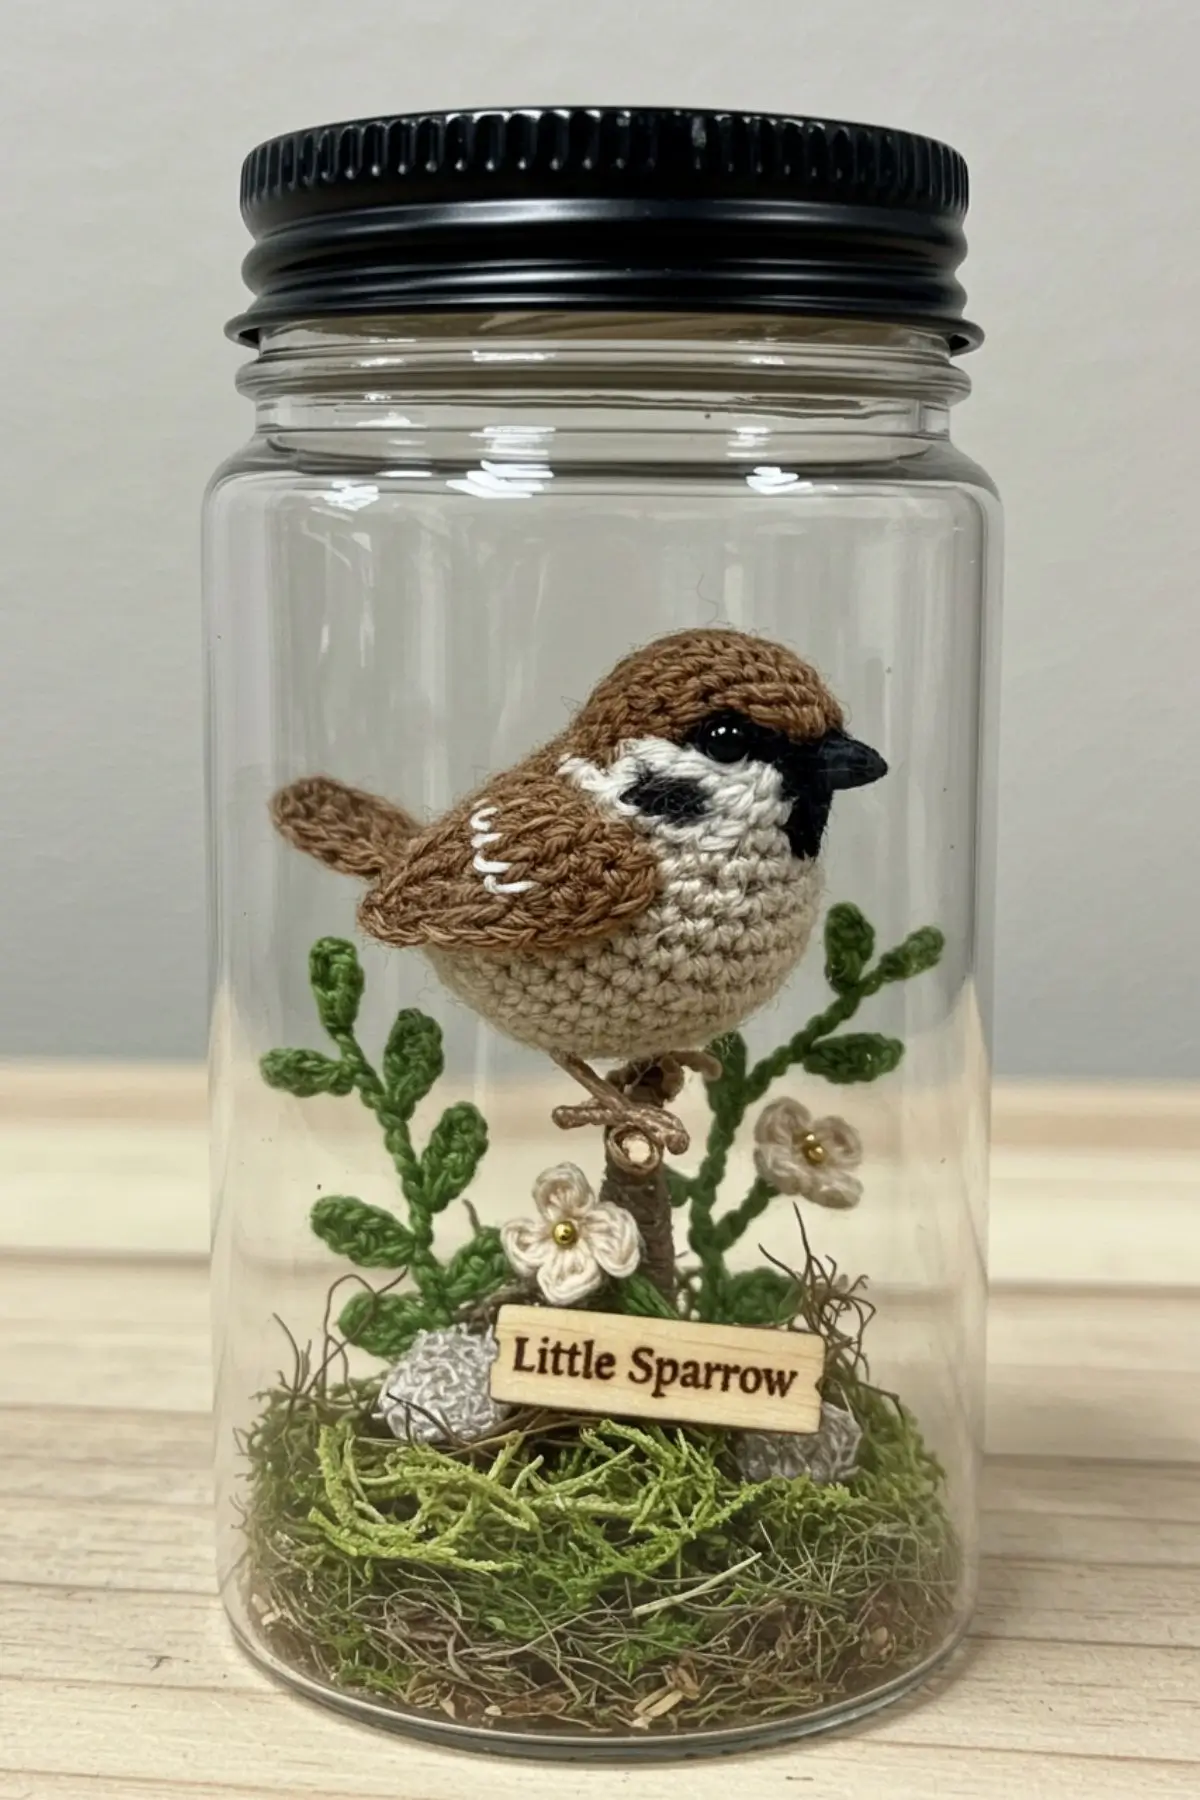
Finished crochet sparrow displayed in a decorative glass jar.
I’m so excited to share this crochet sparrow pattern with you! This tiny sparrow amigurumi, standing at approximately 7 cm tall, is a joy to make and perfect for creating something meaningful by hand. Inspired by the gentle presence of sparrows in my grandmother’s garden, this pattern captures the charm of these little birds in a soft, handmade form. Whether you’re a beginner or an experienced crocheter, this easy project is a lovely way to bring a touch of nature to your hook.
Why This Sparrow Holds a Special Place
Growing up, I spent countless afternoons in my grandmother’s garden, listening to sparrows chirping softly in the bushes and hopping between flower beds. Their quiet presence and simple beauty always brought a sense of calm. This sparrow pattern is my way of stitching those memories into something tangible—a small reminder of peaceful moments and simple joys. Crocheting this little bird feels like capturing a moment of tranquility, and I hope it brings the same warmth and comfort to you.
What Makes This Pattern Unique
This easy-rated pattern is designed to be approachable, with a finished size of approximately 7 cm, making it perfect for quick projects or thoughtful handmade gifts. The design uses classic sparrow-inspired colors such as beige, light brown, brown, and dark brown, but you’re welcome to experiment with alternative shades—soft pastels, muted neutrals, or even brighter tones for a decorative or fantasy bird.
The pattern is worked in separate pieces—body and head, beak, paws, wings, and tail—which are then assembled. This structure offers an enjoyable way to practice essential amigurumi construction skills while keeping the project beginner-friendly.
Skill Level: Easy
Time Required: 3–5 hours
Customization: Adjust colors or add embroidered details to give your sparrow a personal touch
Gathering Your Crochet Supplies
To bring this sparrow to life, you’ll need a few simple materials. I’ve chosen soft, durable yarn to ensure the finished piece is cozy, sturdy, and suitable for gifting or decorating.
Yarn:
100% cotton, sport-weight (approximately 254 m / 125 g)
Suggested colors for a sparrow: Beige, Light Brown, Brown, or Dark Brown
You may use any color combination you prefer, including decorative or fantasy shades.
Substitution: Any sport-weight yarn (such as a cotton-acrylic blend) may be used; adjust your hook size as needed to match gauge.
Crochet Hook:
2.00 mm (or size needed to achieve gauge)
Tools:
-
Sewing needle
-
Scissors
-
Soft stuffing (polyfill)
-
Fine cotton yarn (1000 m / 151.3 g, TEX 151) for embroidering eyes
-
Optional: 6 mm safety eyes (not recommended for children under 3)
Understanding the Crochet Terms
Before we start, let’s go over the abbreviations used in this pattern. They’re standard US terms, making it easy to follow along.
-
rnd(s): round(s)
-
st(s): stitch(es)
-
ch: chain
-
slst: slip stitch
-
sc: single crochet
-
hdc: half double crochet
-
inc: increase (2 sc in one st)
-
inc-hdc: half double crochet increase (2 hdc in one st)
-
inc-3: 3 sc in the same st
-
dec: decrease (sc2tog)
Step-by-Step Crochet Instructions
Here’s where the magic happens! Follow these detailed instructions to crochet each part of your sparrow amigurumi. The steps are written clearly and worked in sequence to make the process easy and enjoyable.
Body and Head
Color: Sparrow main body color
(Choose one or combine: beige, light brown, brown, or dark brown)
Round 1: 6 sc in magic ring (6)
Round 2: 6 inc (12)
Round 3: (1 sc, 1 inc) × 6 (18)
Round 4: 2 sc, 1 inc, 2 sc, (1 inc, 2 sc) × 2, 1 inc, (2 sc, 1 inc) × 2 (24)
Round 5: 6 sc, 1 sc, 1 inc, 7 sc, 1 inc, 1 sc, 6 sc, 1 inc (27)
Rounds 6–7: 6 sc, 13 sc, 8 sc (27)
Round 8: 6 sc, 1 sc, 1 dec, 7 sc, 1 dec, 1 sc, 6 sc, 1 dec (24)
Round 9: 3 sc, 1 inc, 2 sc, 1 sc, (1 inc, 3 sc) × 2, 1 inc, 2 sc, 1 sc, 1 inc, 3 sc, 1 inc (30)
Round 10: 4 sc, 1 inc, 2 sc, 2 sc, (1 inc, 4 sc) × 2, 1 inc, 2 sc, 1 inc, 4 sc, 1 inc (36)
Round 11: 9 sc, 17 sc, 10 sc (36)
Round 12: 9 sc, 17 sc, 10 sc, 1 inc, 1 sc, 1 inc, 2 sc, 9 sc, 1 inc (39)
Round 13: 9 sc, 19 sc, 11 sc (39)
Round 14: 6 sc, 1 inc, 2 sc, 20 sc, 2 sc, 1 inc, 6 sc, 1 inc (42)
Round 15: 6 sc, 1 inc, 2 sc, 22 sc, 2 sc, 1 inc, 7 sc, 1 inc (45)
Round 16: 10 sc, 2 sc, (1 dec, 6 sc) × 2, 1 dec, 2 sc, 13 sc (42)
Round 17: 9 sc, 3 sc, (1 dec, 5 sc) × 2, 1 dec, 3 sc, 11 sc (39)
Round 18: 9 sc, 3 sc, (1 dec, 4 sc) × 2, 1 dec, 13 sc (36)
Round 19: (4 sc, 1 dec) × 6 (30)
Round 20: (3 sc, 1 dec) × 6 (24)
Round 21: (2 sc, 1 dec) × 6 (18)
Stuff firmly without stretching stitches.
Round 22: (1 sc, 1 dec) × 6 (12)
Round 23: 3 dec (9)
Fasten off and weave in ends.
Beak
Color: Dark brown or black
(Use a very dark shade to match real sparrow beaks)
Round 1: 4 sc in magic ring (4)
Round 2: (1 sc, 1 inc) × 2 (6)
Round 3: 6 sc (6)
Fasten off, leaving a long tail for sewing.
Paws
Color: Brown or dark brown
(Choose a shade close to the body color for a natural look)
Round 1: 6 sc in magic ring (6)
Round 2: 6 sc (6)
Fasten off, leaving a tail for sewing.
Right Wing
Color: Body color or a slightly darker brown
(You may use a contrasting brown to create feather definition)
Row 1:
Ch 13, starting in 2nd ch from hook:
8 sc, 3 hdc, inc-3, 3 hdc, 6 sc, ch 1, turn.
Row 2:
Slst in first st, 8 sc, 3 inc, 3 hdc, 8 sc, ch 3, turn.
Row 3:
Starting in 2nd ch from hook:
slst, 9 sc, 4 hdc, (inc, sc) × 2, inc, 3 hdc, sc, 4 slst.
Fasten off, leaving a tail for sewing.
Left Wing
Color: Same as right wing
Row 1:
Ch 13, starting in 2nd ch from hook:
8 sc, 3 hdc, inc-3, 3 hdc, 8 sc, ch 3, turn.
Row 2:
Starting in 2nd ch from hook:
slst, 9 sc, 3 hdc, 3 inc, 9 sc, ch 1, turn.
Row 3:
Slst in first st, 5 sc, 3 hdc, (inc, sc) × 2, inc, 4 hdc, sc, 8 slst.
Fasten off, leaving a tail for sewing.
Tail
Color: Same as wings or slightly darker brown
Row 1:
Ch 9, starting in 2nd ch from hook:
4 sc, 3 hdc, inc-3, 3 hdc, 4 sc, ch 1, turn.
Row 2:
6 sc, 5 inc, 6 sc.
Fasten off, leaving a long tail for sewing.
Putting Your Bird Together
Beak: Sew the beak between rounds 5 and 8 on the front of the head, centered.
Wings: Sew the wings securely to the sides of the body between rounds 10 and 15. Fabric glue may be used only for decorative display items and is not recommended for toys or baby gifts.
Tail: Sew the tail between rounds 16 and 17 at the back, centered.
Paws: Sew the paws under the body, slightly forward for balance.
Eyes: Embroider eyes between rounds 5 and 6, leaving 5 stitches between them, using fine cotton yarn. Alternatively, attach 6 mm safety eyes (not recommended for children under 3).
Tip: Use pins to position all parts before sewing to ensure symmetry.
Tips to Make Your Crochet Shine
I’ve learned a few tricks over the years that make crocheting these bird even more fun. Here are my favorites to help you along!
-
Stuffing: Fill the body firmly but gently to avoid stretching stitches. Check for evenness before closing.
-
Symmetry: Pin wings and paws before sewing to ensure they’re balanced. It’s a game-changer!
-
Color Changes: For a seamless look, practice color changes with our color change tutorial. It’s easier than it looks!
-
Yarn Choice: If sport-weight yarn isn’t available, a cotton-acrylic blend works great—just adjust your hook size to match the gauge.
-
Finishing: Weave in ends with a tapestry needle for a neat finish. Lightly block wings and tail to shape them perfectly.
FAQs:
-
Can I use different yarn weights for this pattern?
While sport-weight yarn is ideal, you can use other weights by adjusting the hook size. A heavier yarn will make a larger bird, so keep that in mind for sizing. -
How do I embroider the eyes safely?
Use fine cotton yarn to create small stitches or French knots for the eyes. Sew them securely between rounds 5 and 6, about 5 stitches apart, for a cute, baby-safe look. -
Is this pattern suitable for baby gifts?
For baby gifts, embroidered eyes are strongly recommended to avoid choking hazards. This pattern can be safely used for baby items when all parts are securely sewn and no plastic components are used. -
How long does it take to complete one bird?
Depending on your skill level, each bird takes about 3–5 hours. Beginners might need a bit longer, but the clear instructions make it manageable. -
Can I customize the colors?
Absolutely! Try bright colors like red for a cardinal or soft pastels for a fantasy bird. Just match the yarn weight to keep the size consistent.
Conclusion
I hope you’ve enjoyed crocheting this sweet sparrow amigurumi as much as I did! It’s more than just a project—it’s a little token of joy, perfect for gifting or brightening your space. Share your creations on Pinterest, and let’s inspire each other. Pin this pattern to your boards for later, and happy crocheting!